This guide will help you quickly set up the Callyzer Biz Android application on your employee’s mobile device.
Follow the step-by-step instructions carefully on the employee’s phone to register them with the Callyzer Portal as an Employee.
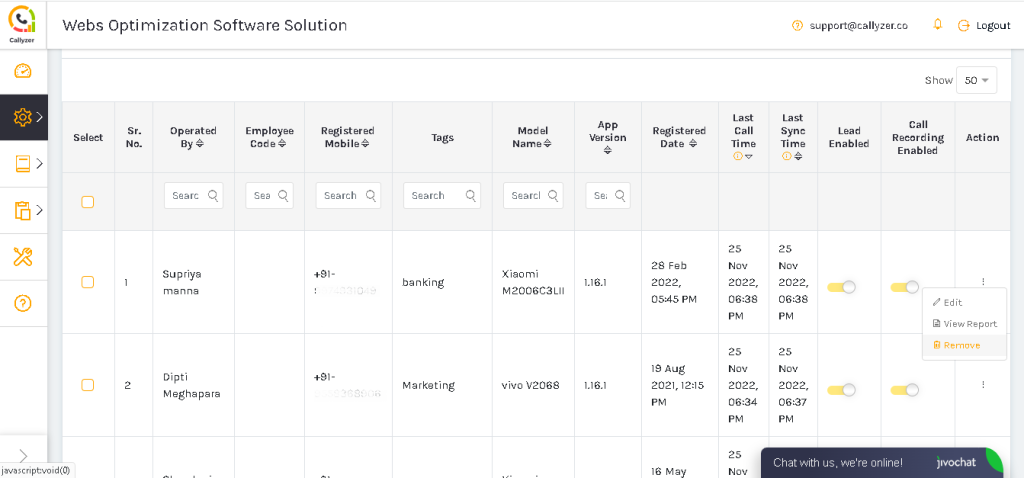
Once the setup is complete, the employee’s call data will appear under Manage → Employee in your Callyzer dashboard.
Watch the video guide for easy setup instructions.
Follow the steps on the employee’s phone (English)
Follow the steps on the employee’s phone (Hindi)
Download and install the “Callyzer Biz“ application from the Playstore.
To download the application, Click:
https://play.google.com/store/apps/details?id=com.websoptimization.callyzerbiz&hl=en_IN
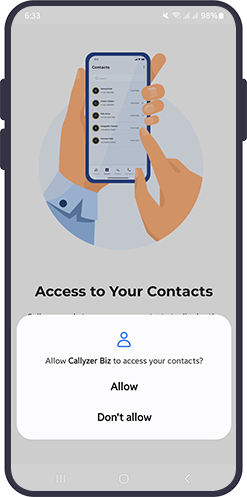
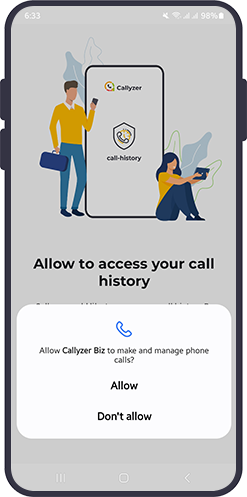
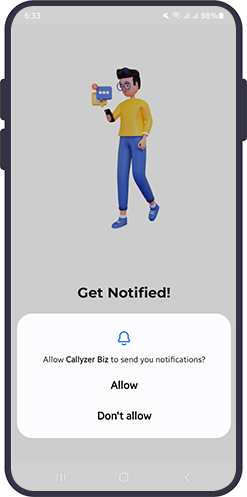
After installation, the application will ask you for basic permissions. These permissions are mandatory.
Click on “Allow” to give permission.
Callyzer Biz will ask for a Device Connect Code. You can get your device connect code from the organization or company.
You device connect code will be like [XXX-XXX-XXX].
Enter the Device Connect Code and click “Next”.

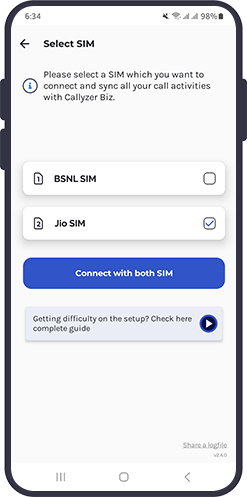
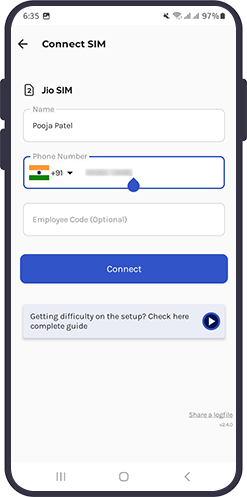
Select the SIM you want to connect and sync your calling activities with Callyzer Biz.
For example, if you have two SIM cards — BSNL for personal use and Jio for official calls — you should select (check) Jio and deselect (uncheck) BSNL.
This way, only your Jio call data will sync with Callyzer, while BSNL calls will not be tracked.
After selecting the appropriate SIM, click the “Connect” button to proceed to the next screen.
Fill in the required basic details to complete the SIM connection process. Once all details are entered, click on the “Connect” button to proceed.
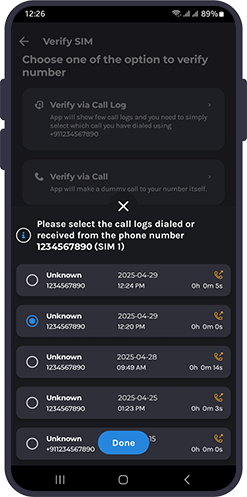
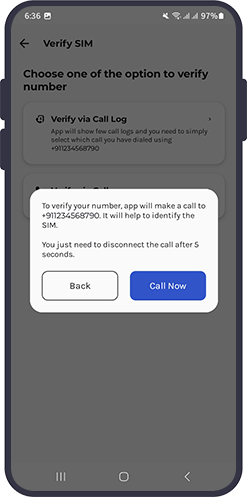
To successfully map the SIM card with call logs, you need to verify your phone number. There are two options to verify. You can choose any one.
Application will show you a call log list, you simply need to select the call log which was made using the phone number you are going to register with callyzer and click “Done”.
Application will make a 5s dummy call on your registered mobile number to verify. If the call is not auto disconnected in 5s, you can disconnect from your end.
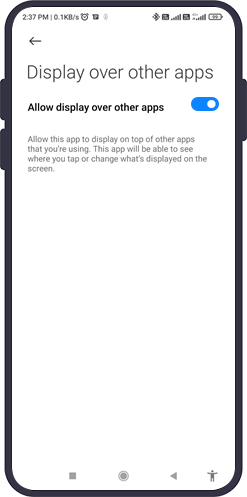
Allow Callyzer biz to overlap other applications on your mobile phone. This feature will help you to comment/add notes after completing each call.
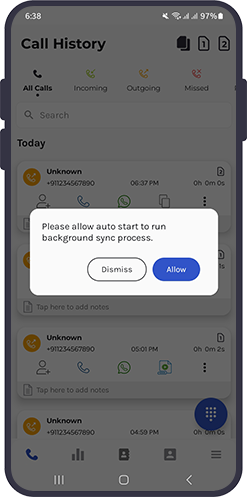
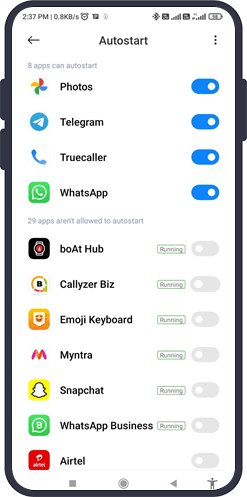
Click “Allow” to enable the auto start option. By allowing auto start, the application will run in background and keep syncing your data.
This guide provides step-by-step instructions to set up and configure the Lead Capture Form Connector in Callyzer.
With this, you can easily generate an HTML code that will create a web form which you can integrate into your website to capture leads in Callyzer.
It can also be used to capture Google Ads leads. After integrating this form into your website, you can use the URL of this web form as a landing page in Google Ads. When a user clicks your ad, they will be redirected to this form, fill in their details, and submit them. These details will then be captured as a lead in Callyzer.
Callyzer cannot help you to retrieve your deleted call logs. However, if you had the Callyzer application already installed in your phone before deleting you can get the deleted call logs in the application.
Callyzer is a call analyzer application, which helps you to analyze and track your calling activities. You cannot access or fetch other’s call details using Callyzer.
You can go to Help & Support and find your device connect code.
Unfortunately, the Callyzer application is not available at the AppStore. According to the Apple co. policy any application is not permitted to access call logs.
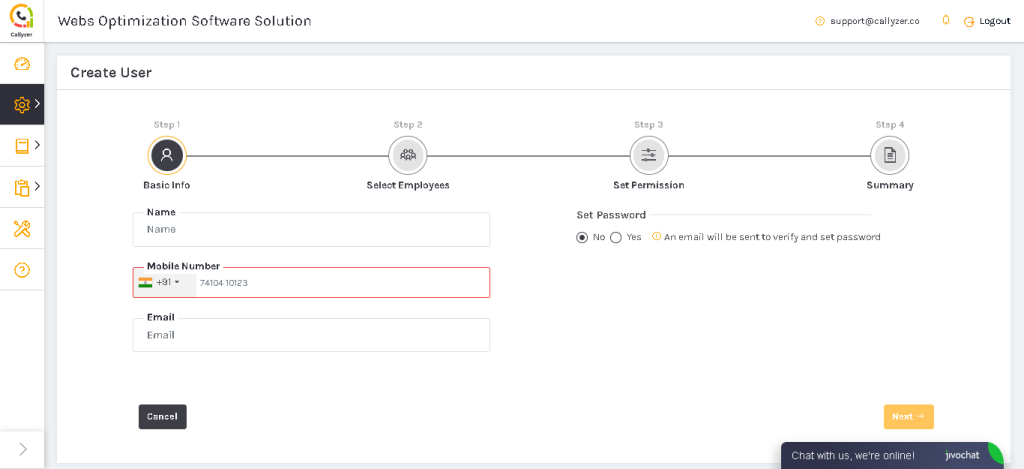
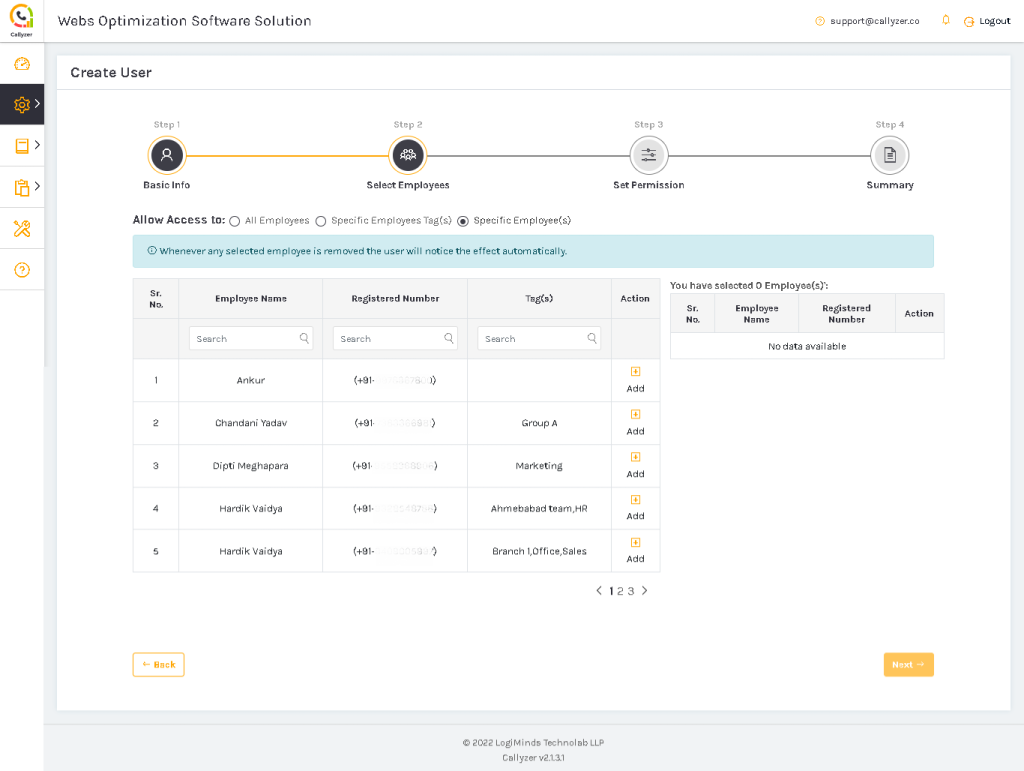
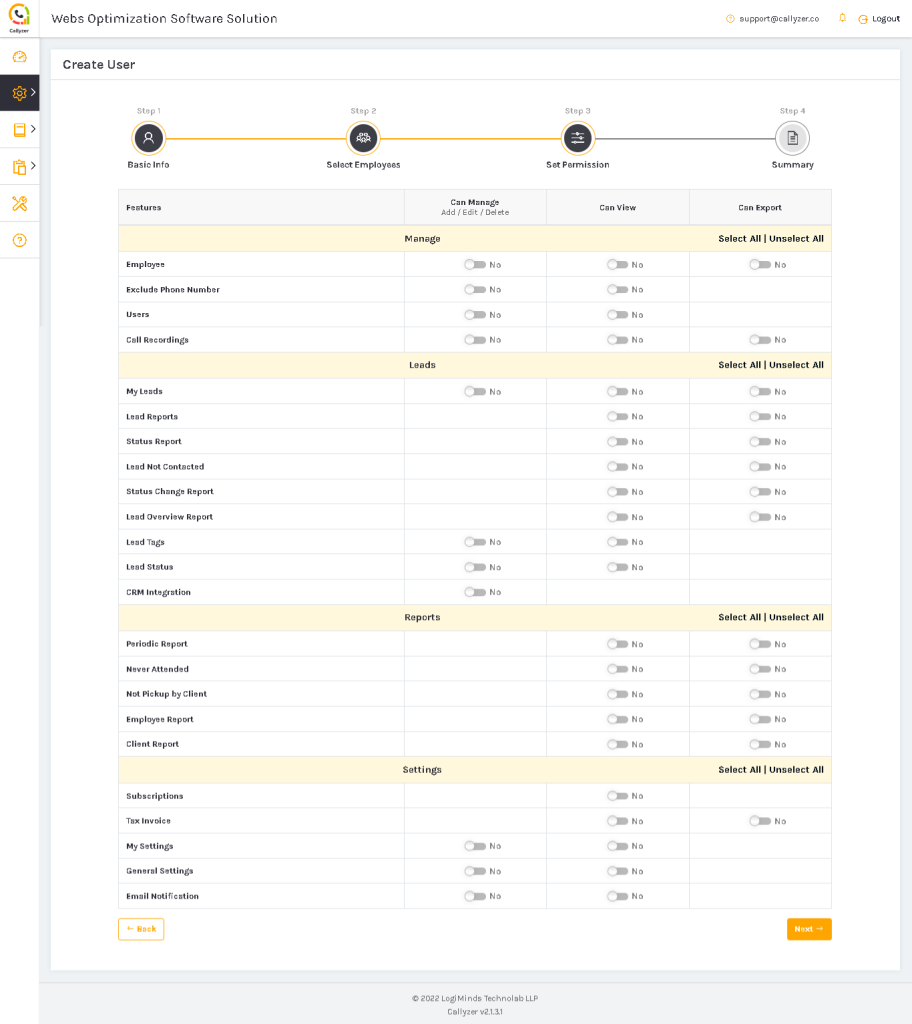
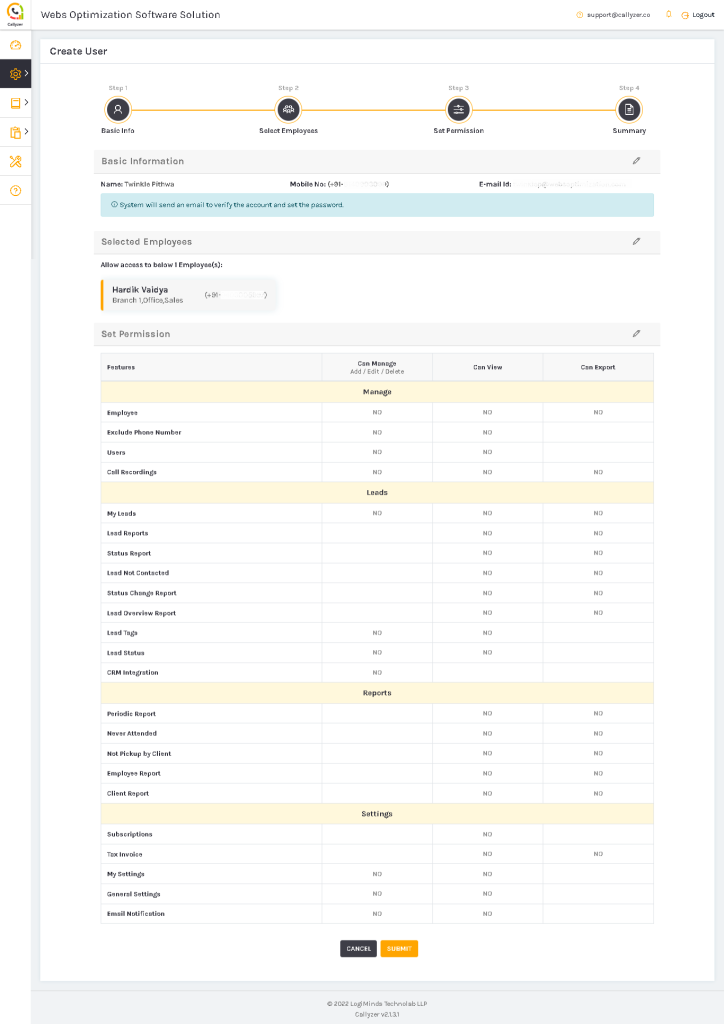
For hierarchy management system, Callyzer allows business owners and managers to add sub-users. To add a sub-user, follow the following steps.
Option 1: All Employees: By selecting this option, user can access data of each employee.
Option 2: Select Employee Tag(s): By selecting this option, user can access data of the respective employee tags. For instance, if employee tags like region is selected. User will be able to access data of each employees from the defined region.
Option 3: Specific Employee: By selecting this option, user can access data of the selected employees.
After selecting click “Next” to proceed.
When you change the phone number, your data and analysis from the older number is not affected. Your previously synchronized data like call logs, lead data, lead reports, call analysis reports will be available in your dashboard as it is.
To change the phone number, follow the quick steps guided below:

 Go to Callyzer